Set up Miura device in the LineSkip POS
- Open the LineSkip POS and enter “Settings” from the main POS page.
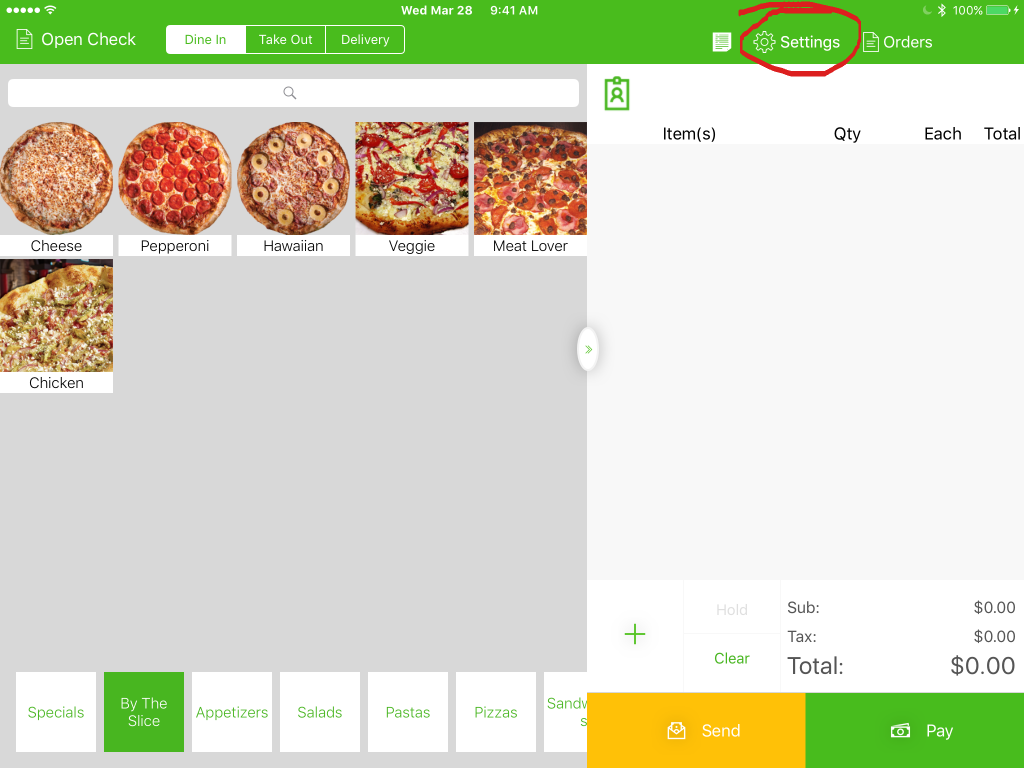
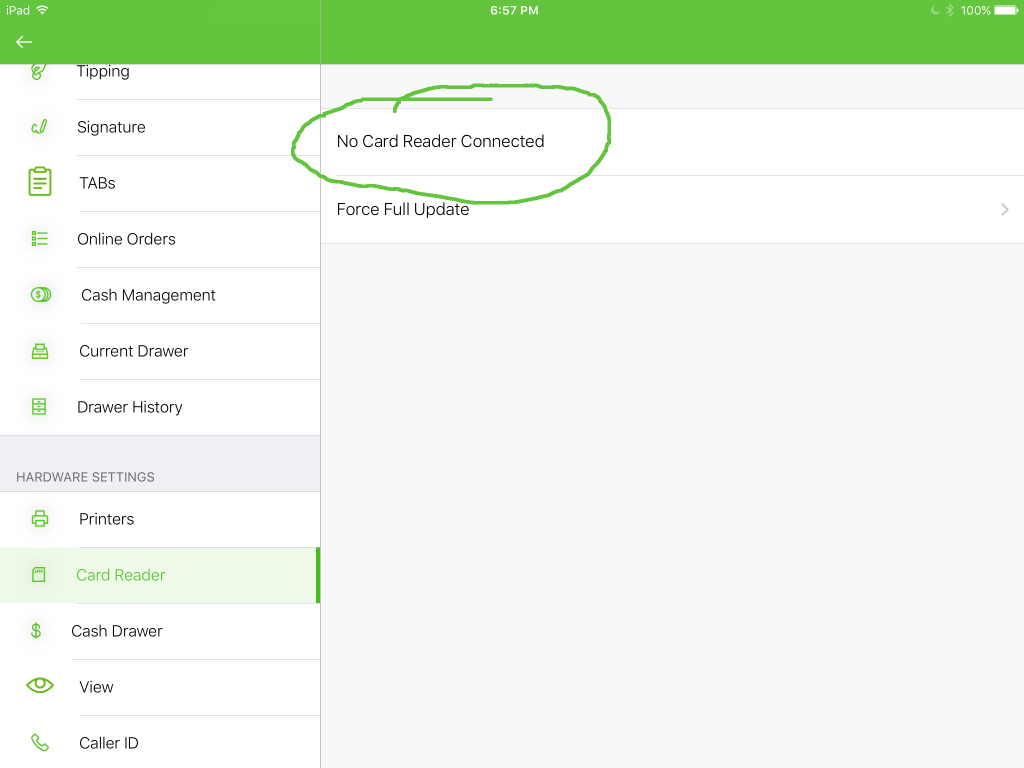
- Scroll down the left hand column to locate the “Hardware” section and select “Card Reader”.

- Select the “No Card Reader Connected”. If you have previously paired a card reader, it may list a connected card reader. Then choose from the list of available card readers. If none appear on the list, hit the refresh icon in the upper right hand corner of the menu and wait 5 to 10 seconds. Be sure the card reader is lit up and says “Miura” on the LCD screen, if it is in sleep mode, it will not appear on the list.
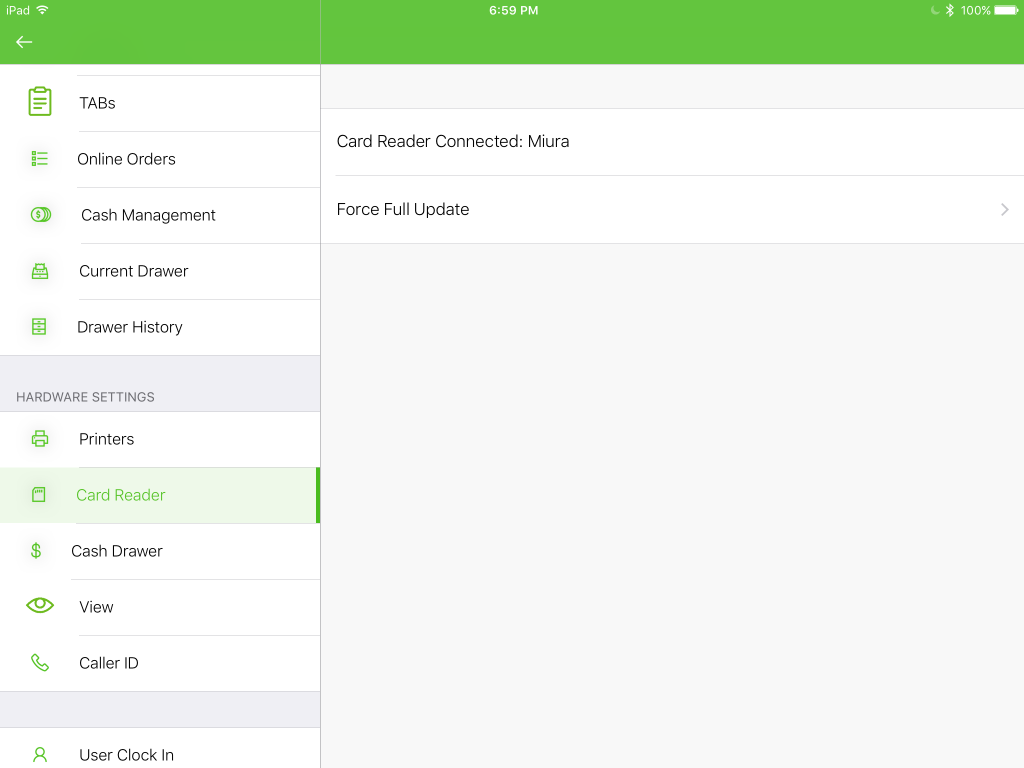
- When a card reader is initially connected, it may take up to a minute to perform a security update. Once connected, the card reader will display your store’s name on the LCD screen and the LineSkip POS will display the Miura device it is connected to.