Setting a static IP address to an Epson printer will keep the printer from disconnecting from the LineSkip POS when the router resets.
These instructions are meant for the following Epson printer models, with a wired Ethernet connection:
- TM-T20ii
- TM-U220B
- TM-T88V-i
- TM-L90
- TM-M30
- TM-M20
- TM-M10
NOTICE: Improper network settings will cause the printer to be undiscoverable by the LineSkip POS.
Before you begin
You will first need to know the current network address of your printer, and the address range of your wireless network.
Finding your Printer’s Address
- Connect your printer to your router using an Ethernet Cable.
- Power the printer on, and wait for about 20 seconds.
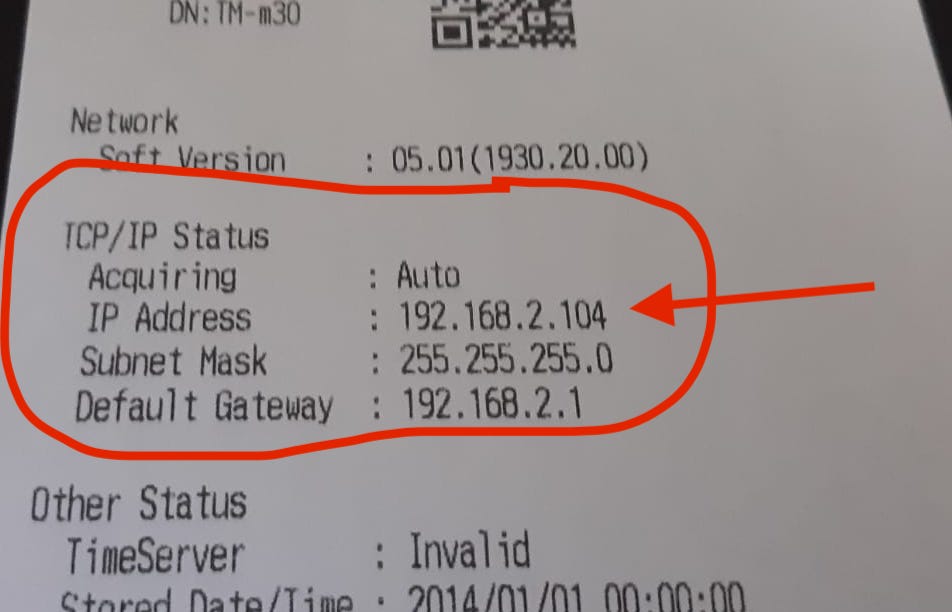
- If it prints out information about its IP address, then save this printout and continue to Finding Your Wireless Network Range.
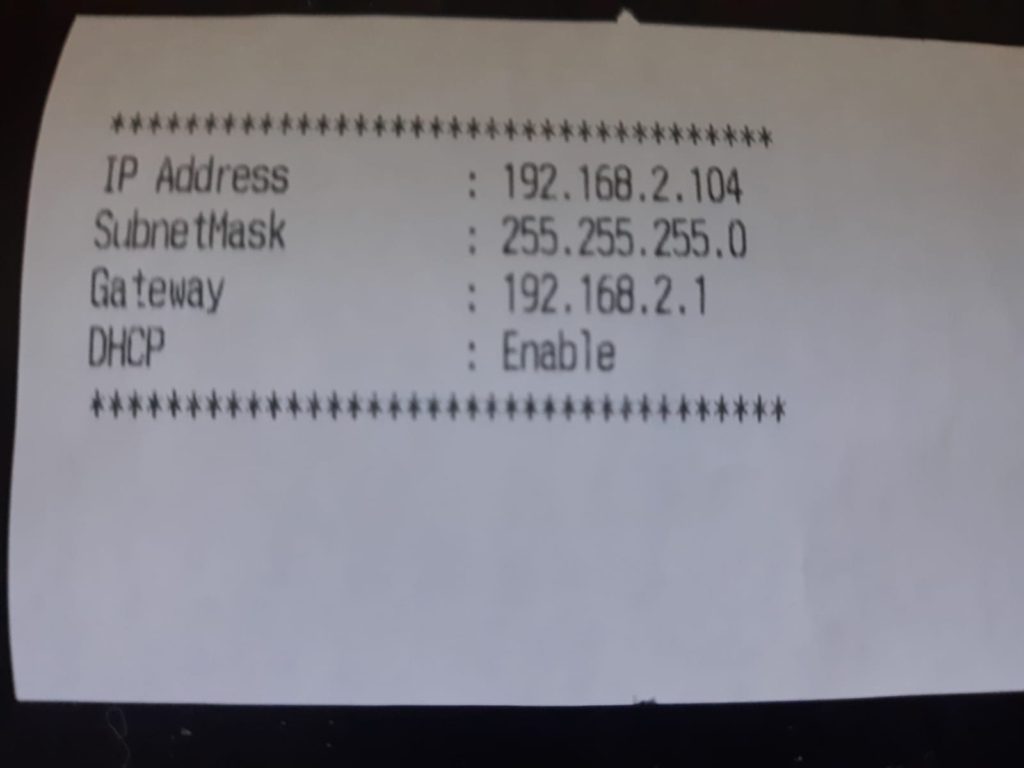
If nothing is printed out, you will need to force the printer to output its configuration information, as described next.
Printer Configuration Output
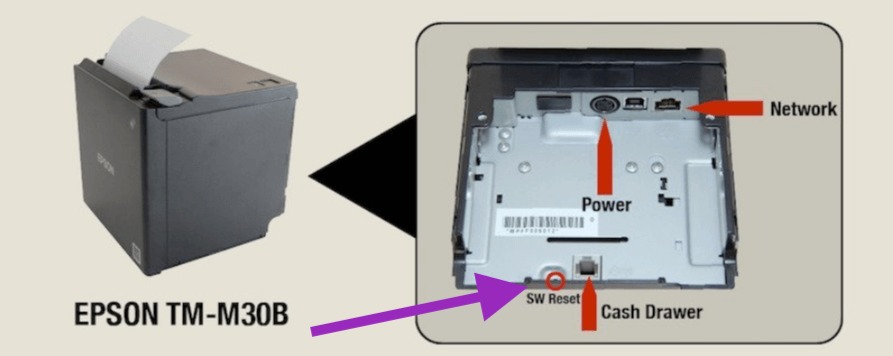
Your Epson printer should have a recessed “reset” button on the underneath. You will need a thin, pointed object to press it, such as a ball-point pen, a paperclip, or a precision screwdriver. Refer to photos below to help you locate the button (purple arrow).
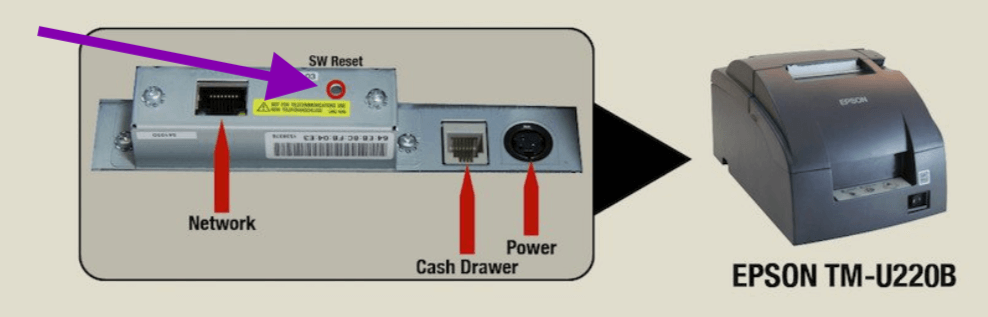
Leaving the power on, carefully tilt the printer onto its side so that you can view the underside clearly. When you locate the switch, use the tip of the pen (or other object) to push and hold the button until the printer begins printing (about 3 seconds).
Finding your Wireless Network Range (Subnet)
In order to communicate with each other, the iPad and printer must be configured so that they have addresses within the same “subnet”. In most cases, this means that the first 3 numbers of the 4-part address are the same.
To find the correct subnet, go to one of your iPads and do as follows:
- Open the iPad settings.

- On the left side, tap “Wi-Fi”
- Find the network you are connected to (the one with the checkmark), and tap its name. Make sure you’re on the network that you will be using with your POS.
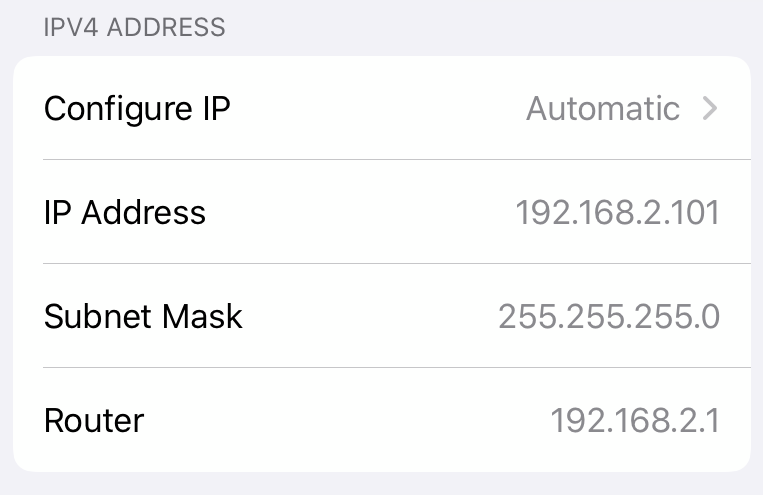
- In the page that opens, locate the line “IP Address”, and write down this address. It will be 4 numbers, separated by decimal points.
Compare Printer and Wi-Fi addresses
In case your iPad and printer are not on the same subnet (the first 3 values in the address are not identical), you will need to follow additional instructions.
Example1:
Your iPad has an IP Address of 192.168.2.101, and your printer has an IP Address of 192.168.2.105. Since they share the same values for the first 3 numbers (192.168.1.x), they are on the same subnet. Continue with the next section.
Example2:
Ipad’s IP Address: 10.10.10.65
Printer IP Address: 192.168.1.50
Since the first 3 parts do not match, you will need to follow the instructions in <link to supplementary article> in order to get them onto the same subnet.
Configuring the Printer
To configure the printer, you will connect to it over the network using a web browser. You can use any browser, either on the iPad or on a laptop or desktop computer, as long as it is on the same network that you use for your POS system.
- Open the browser, and in the location bar, enter the printer’s IP address. For example, if the IP address that printed out was 192.168.0.149, you would go to: http://192.168.0.149
- If the browser complains about the connection not being private, or not secure, do whatever you have to to proceed anyway. (You may have to “view details” followed by “visit anyway”, or similar.)
- When prompted to Log in, do so with the username: epson and password: epson
- From the left, under Configuration, click TCP/IP


- On the next page, set “Acquiring the IP Address” to Manual.
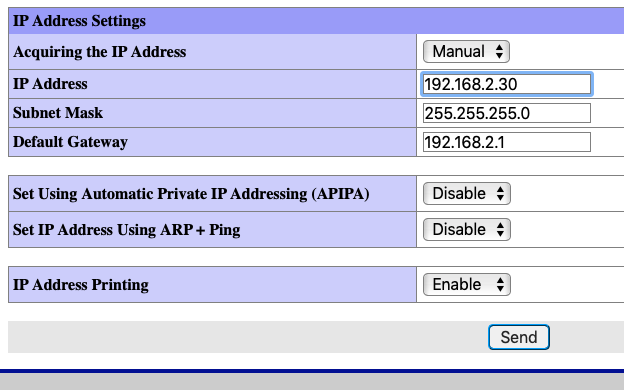
- Enter the printer’s IP in the IP Address field and click Submit at the bottom of the page.
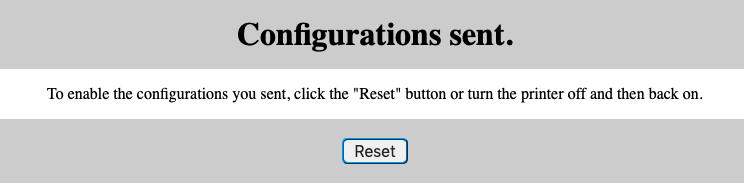
- Click Reset on the next screen
Note: If you change the printer’s IP address, you you will need to reconnect the printer in the LineSkip POS settings.